Prospects Management Guide
This guide provides a detailed explanation of managing prospects in your CRM system. Prospects are potential leads that can be tracked, nurtured, and eventually converted to leads for further processing. Below is a complete breakdown of the actions you can perform on the Prospects page.
The Prospects page is designed to help businesses manage their initial point of contact with potential clients. Prospects are categorized separately to maintain a clear distinction from leads and customers.
Prospects Page Overview
The Prospects page has a layout similar to the Leads and Customers pages, featuring a table displaying all your prospects and actionable buttons for management. Refer to the image below for an overview of the Prospects page layout.

Creating a Prospect
To create a new prospect:
- Click the Add button at the top of the Prospects page.
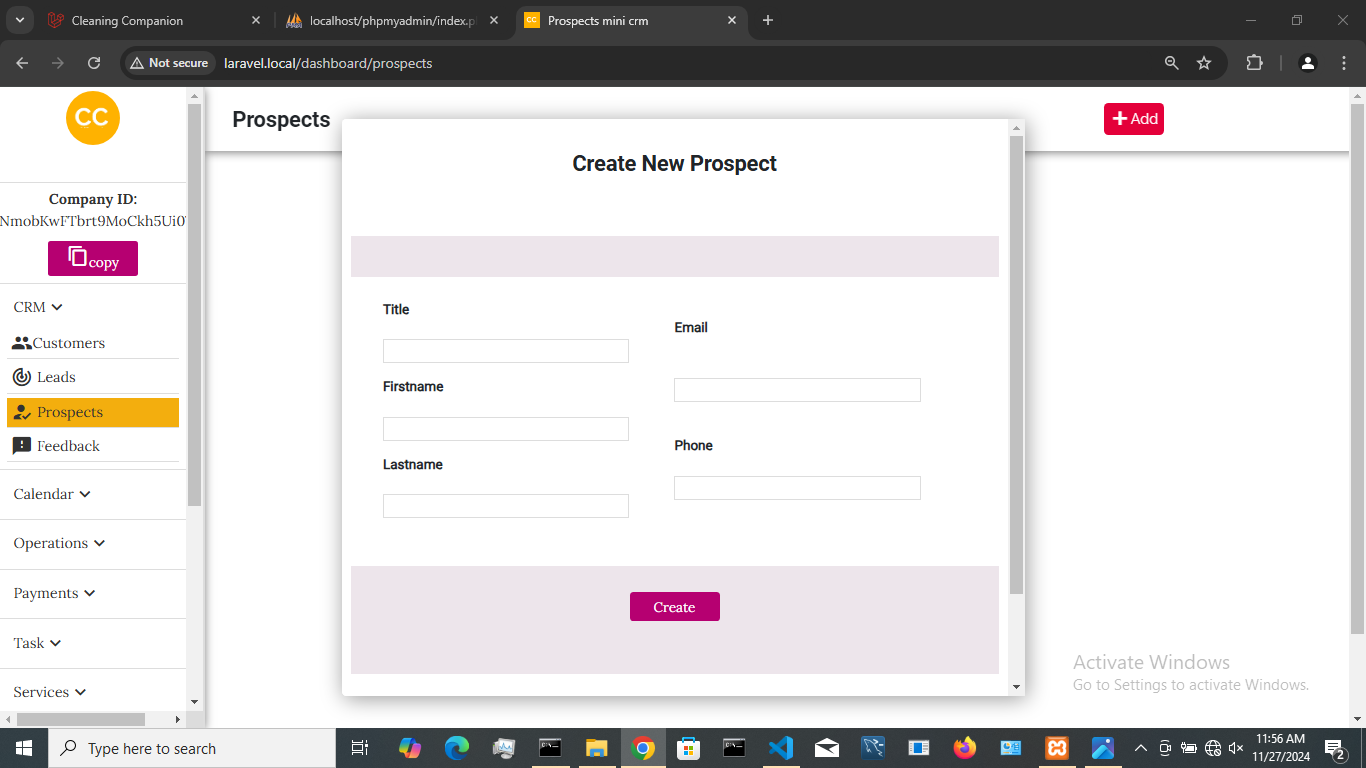
- In the overlay that appears, select Create.
- Fill out the form with details such as Title, First Name, Last Name, Email, and Phone.
- Once the form is completed, click Create. The new prospect will appear on the Prospects page.


Importing Prospects
To bulk import prospects using a CSV file:
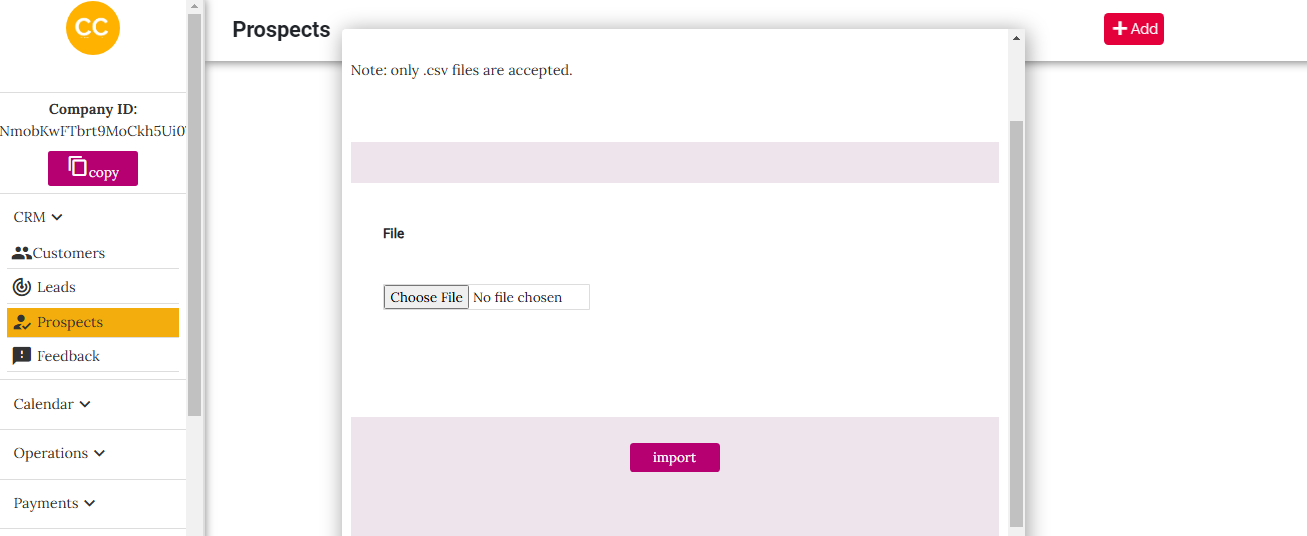
- Click the Add button and select Import from file from the overlay menu.
- Upload your CSV file in the provided form. The file must contain the following headers: Title, First Name, Last Name, Email, and Phone. These headers must match the format exactly.
- After uploading, click Import. The prospects will be added to your CRM system.


Viewing a Prospect
To view the full details of a prospect:
Editing a Prospect
To edit a prospect’s details:
Deleting a Prospect
To delete a prospect:
Converting a Prospect to a Lead
To convert a prospect into a lead:
Exporting Prospects
To export prospects as a CSV file:
Deleting Multiple Prospects
To delete multiple prospects at once:


